FDM - machine operation
1. Software settiing
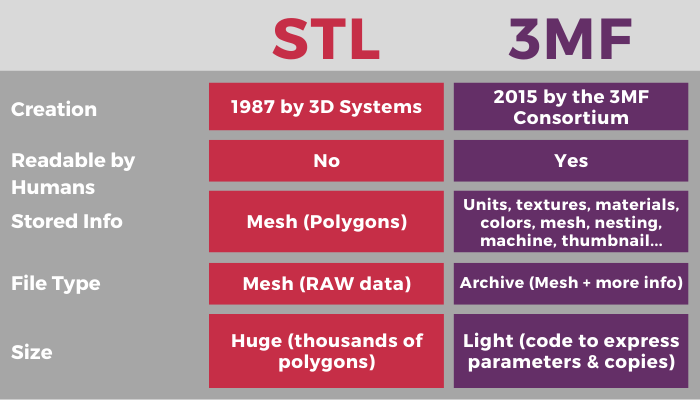
When we have a 3D model and are ready to print, we need a program that prepares your file for your 3D printer. A slicing program takes an STL or OBJ file and creates G-code, the code that instructs your 3D printer where to move the print head to, how fast to move it, and what path to follow. Cura is Ultimaker’s slicing software and it is one of the biggest open source 3D printing software .(reference from Cura) .In addition ,you can use Simplify 3D,Repetier,Slic3r
2. Choice the model
- Click the button(Open file) and choice the model we need to print
- Also we can use mouse to put the stl format into the Cura
- Normal we would use STL,OBJ format ,and some time will use AMF for special requirement
3. Locate the model the model
I use move ,scale to locate the model
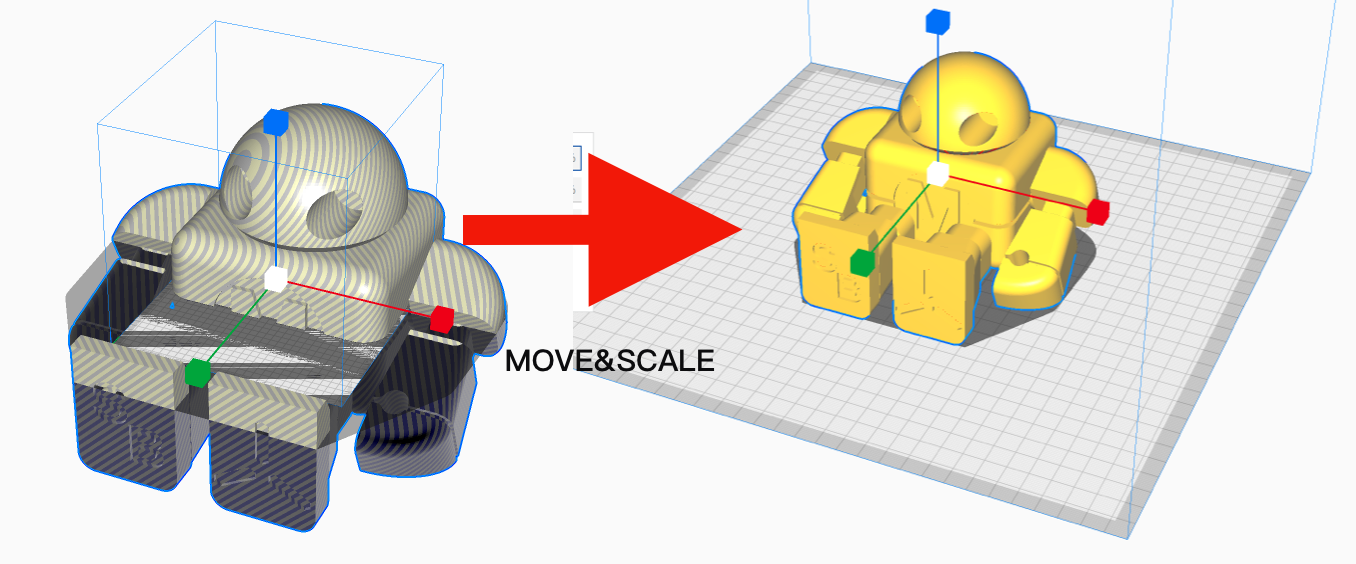 We must make sure the model in the software is yellow, or it would has problem.
4. 3D printer parameter Setting
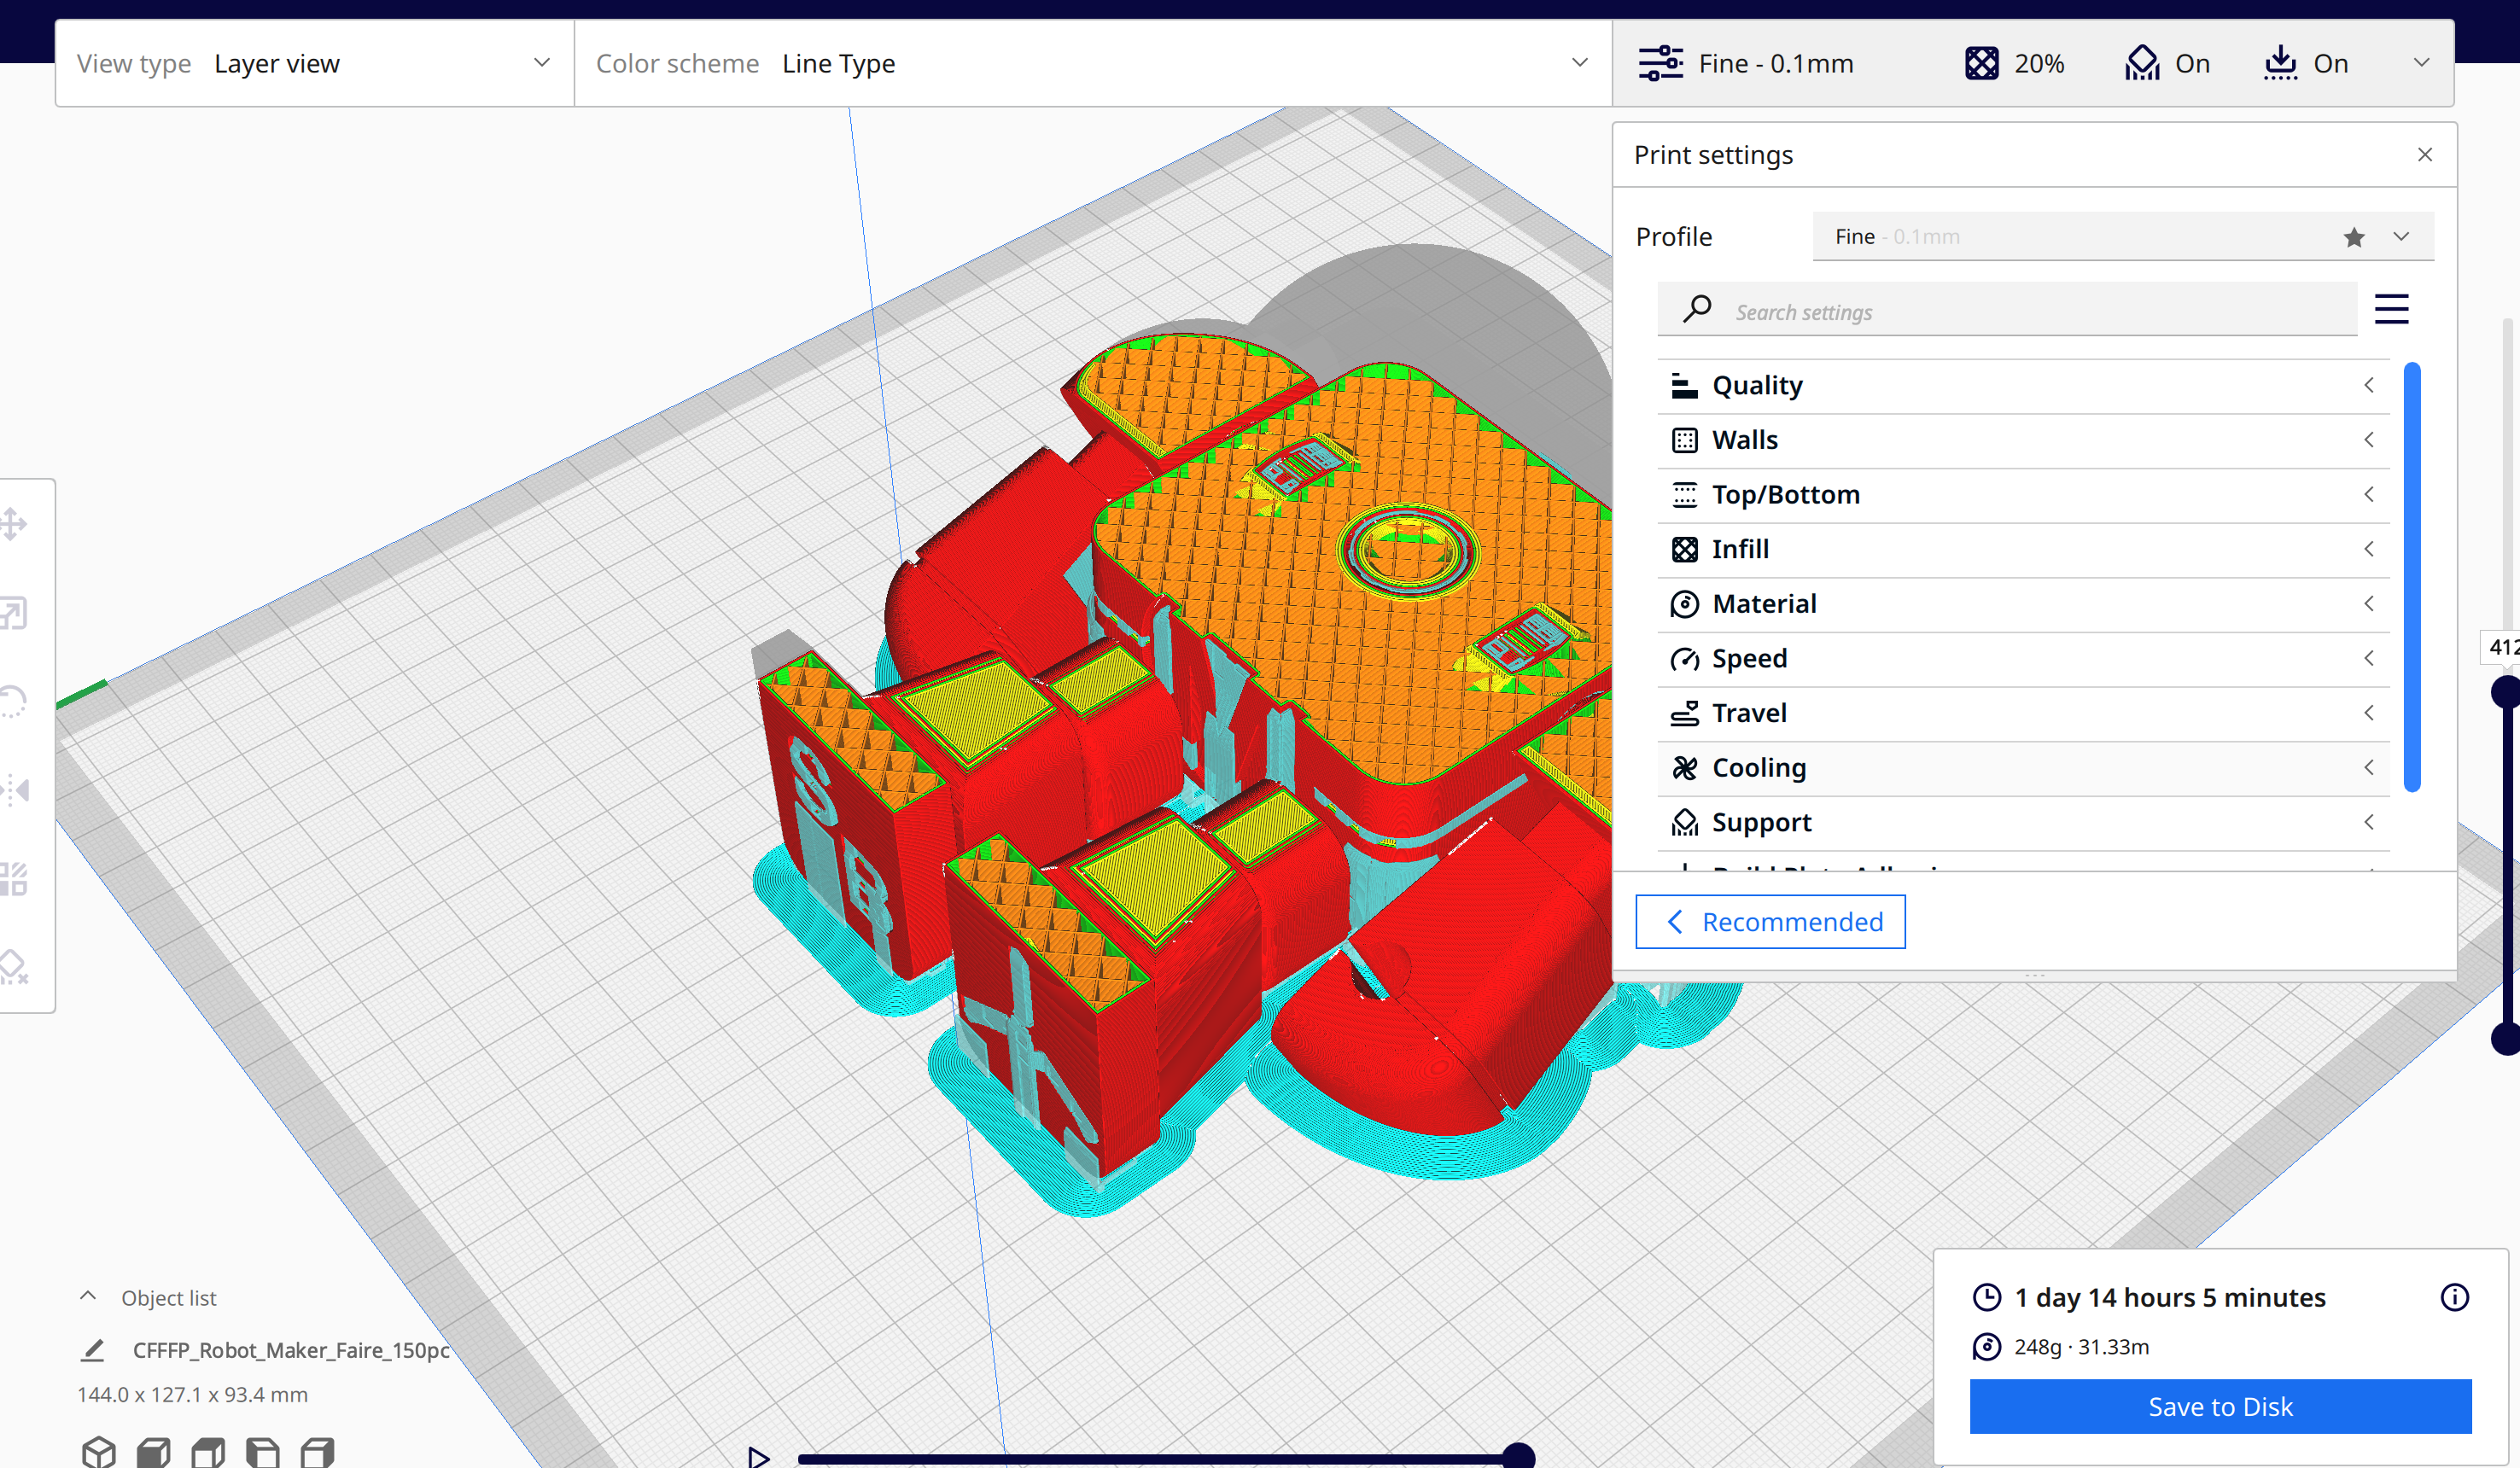
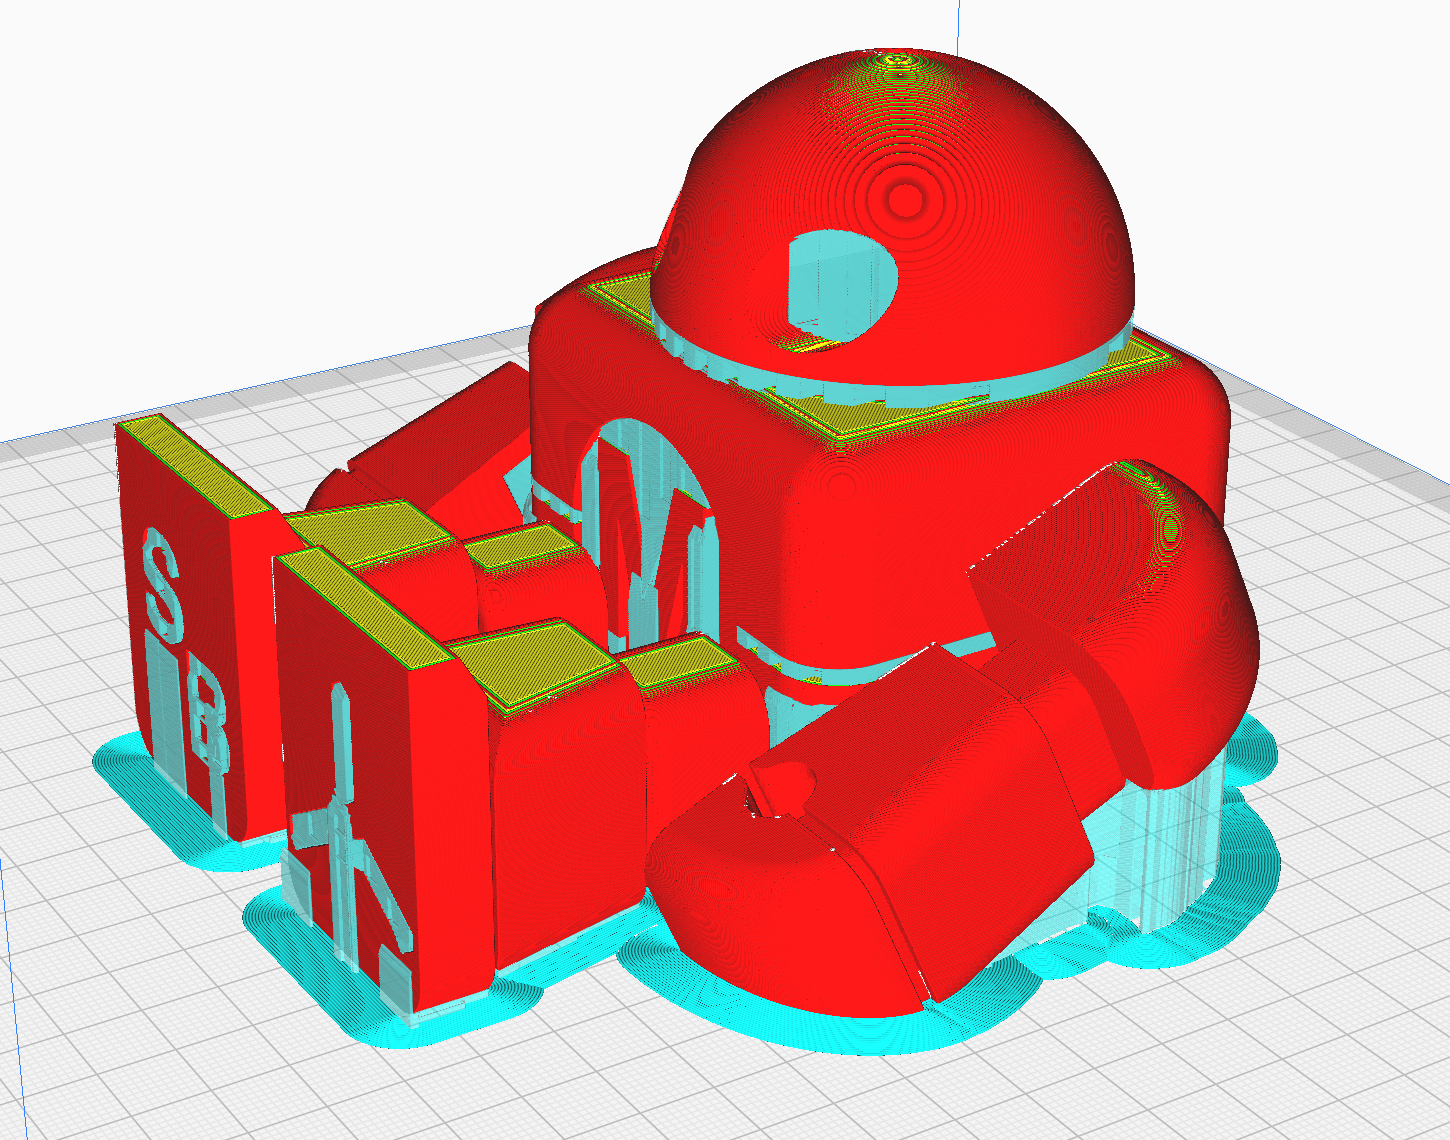
Quality(Layer height:0.1mm ),it is one of the most often changed settings. It means the thickness of one printed layer (in mm). With a thinner layer height you will usually increase the quality of the print, leading to a smoother surface and more detail visible in the Z-direction (height) of the model. On the other hand, by using thicker layers you can decrease the print time substantially.
Shell(wall thickness0.8mm, top thickness1.6mm, bottom thickness 1.6mm).Wall Thickness adjusts the thickness of outside walls (on the X/Y axis) of the model.It is generally a multiple of the line width(in our machine is 0.4mm). In general a wall thickness of 2 or 3 times the line width is sufficient.
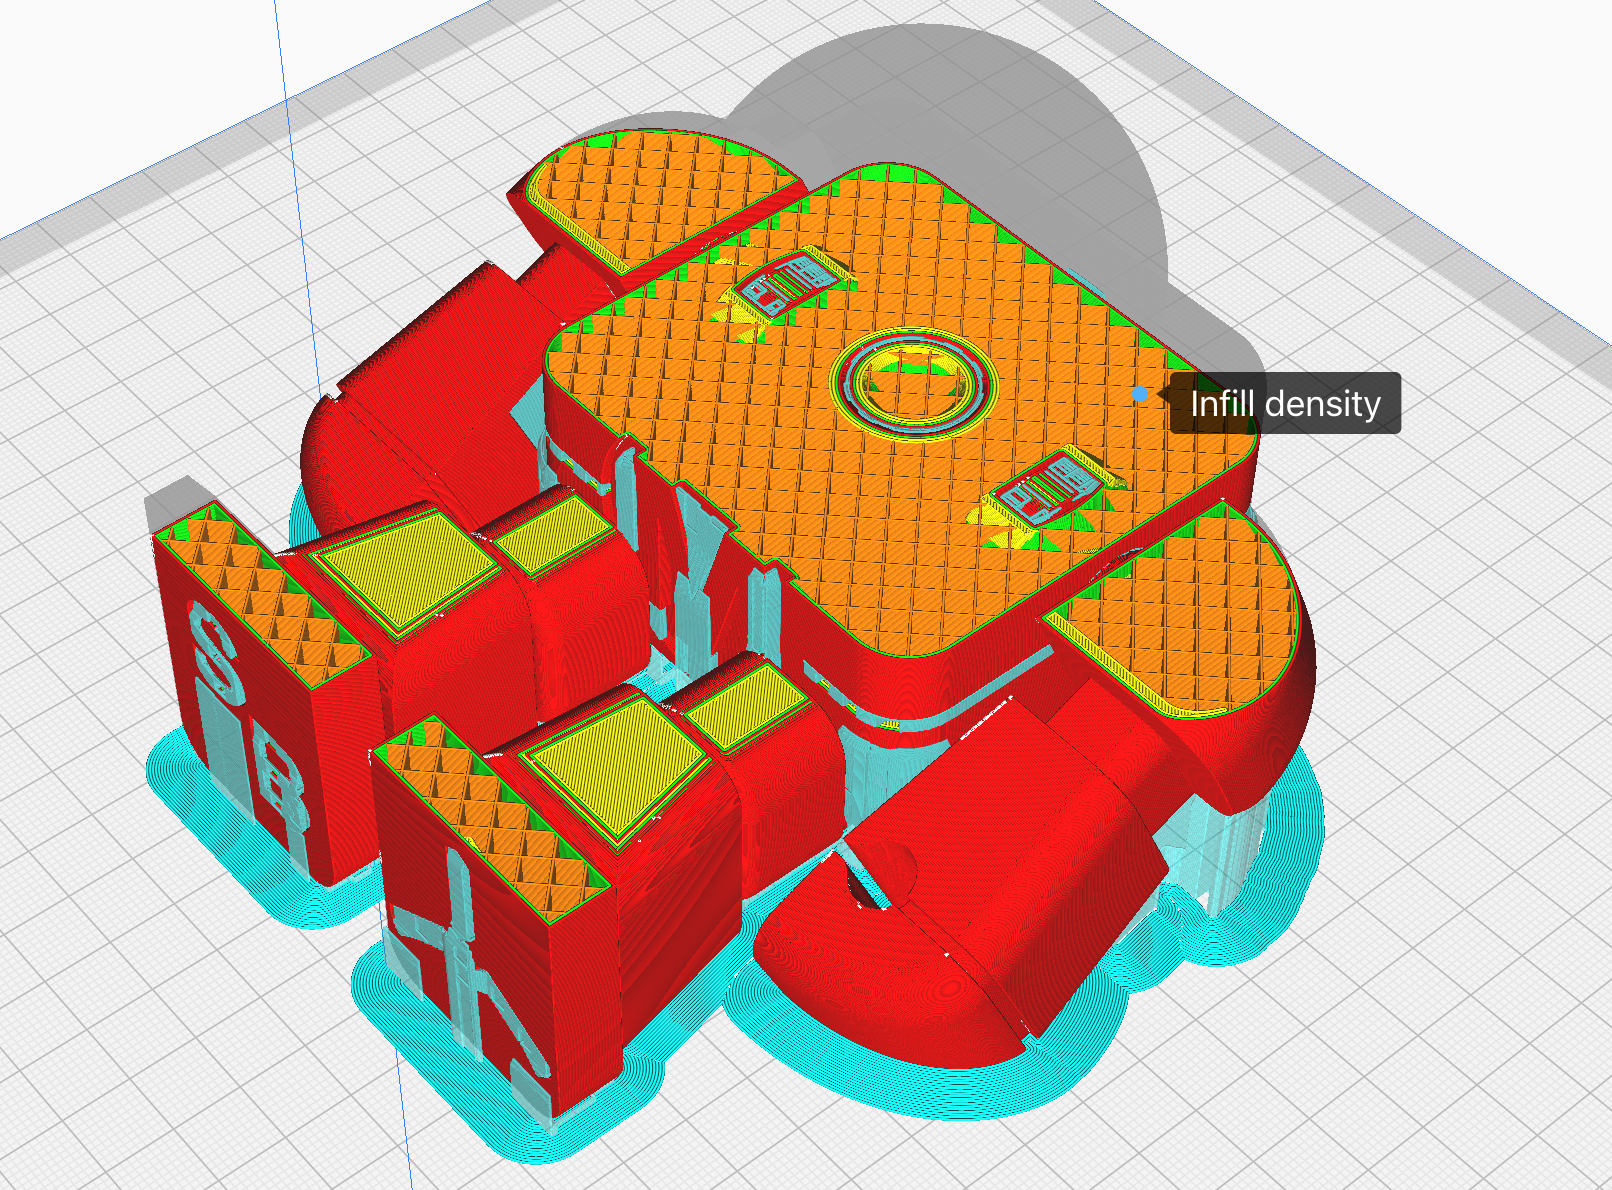
- Infill(5%infill density)—Settings related to the inside of the print. Infill density defines the amount of plastic used on the inside of the print. A higher infill density means that there’s more plastic on the inside of your print, leading to a stronger object. An infill density between 10% and 20% will be enough for most objects though.
- Material(temperature is 200,and Diameter i 3mm)—Settings related to Material. It depend on material. Normal vendor will give us the reference parameter.And we need to test it.In our test ,the temperature is 200, and Diameter is 3mm
- Speed(Infill speed(60)mWall speed(30),Top/bottom speed(20))—Speeds at which the print head moves while printing. A higher print speed will lead to a shorter print time and the effect would a little worse
- Cooling(yes)—Settings that define how the plastic is cooled. I enable the print head fans during printing because cooling will increase the print quality.
- Support(yes)—Options for support structures. Because my models have overhanging parts,I use a support structure under the model to prevent the plastic from falling down
- Platform adhesion(Brim)—Options for how your model relates to the build plate. Options include Brim, Raft, and Skirt.
5. Load material
Load material according to the below picture.I need push the material into the inlet of machine.
6. Check the platform
Rotate the bolt under the platform to change the heigh of platform. Use paper to check it. It is OK if there is resist during moving the paper.
7. Operation the machine
- Open the main power of machine
- Use switch to choice
Print from SD-3D body - Wait for printing;
- After finish ,take it away from platform slowly