1. Prepare

- Hardware: NodeMCU(In this example we choice NodeMCU CP2102)
- Software:Arduino IDE
- We need change additional Boards Manages URL ,and it will help us to install ESP8266 libraries
- Arduino IDE-File-Preference (this is for windows,if your PC is MAC,you can choice Arduino-Preference
- Change additional Boards Manages URL(http://arduino.esp8266.com/stable/package_esp8266com_index.json)

- We need change additional Boards Manages URL ,and it will help us to install ESP8266 libraries
Arduino IDE's libraries
ESP8266WiFi:Open in Arduino IDE-Tools-Board-Boards Manager, and search esp8266 ,then istall(need several minutes). If success,open TOOLS-borads and find "NodeMCU1.0(ESP-12E Module)"


Crypto:The library is split into four main sections: core, light-weight, legacy, and other.
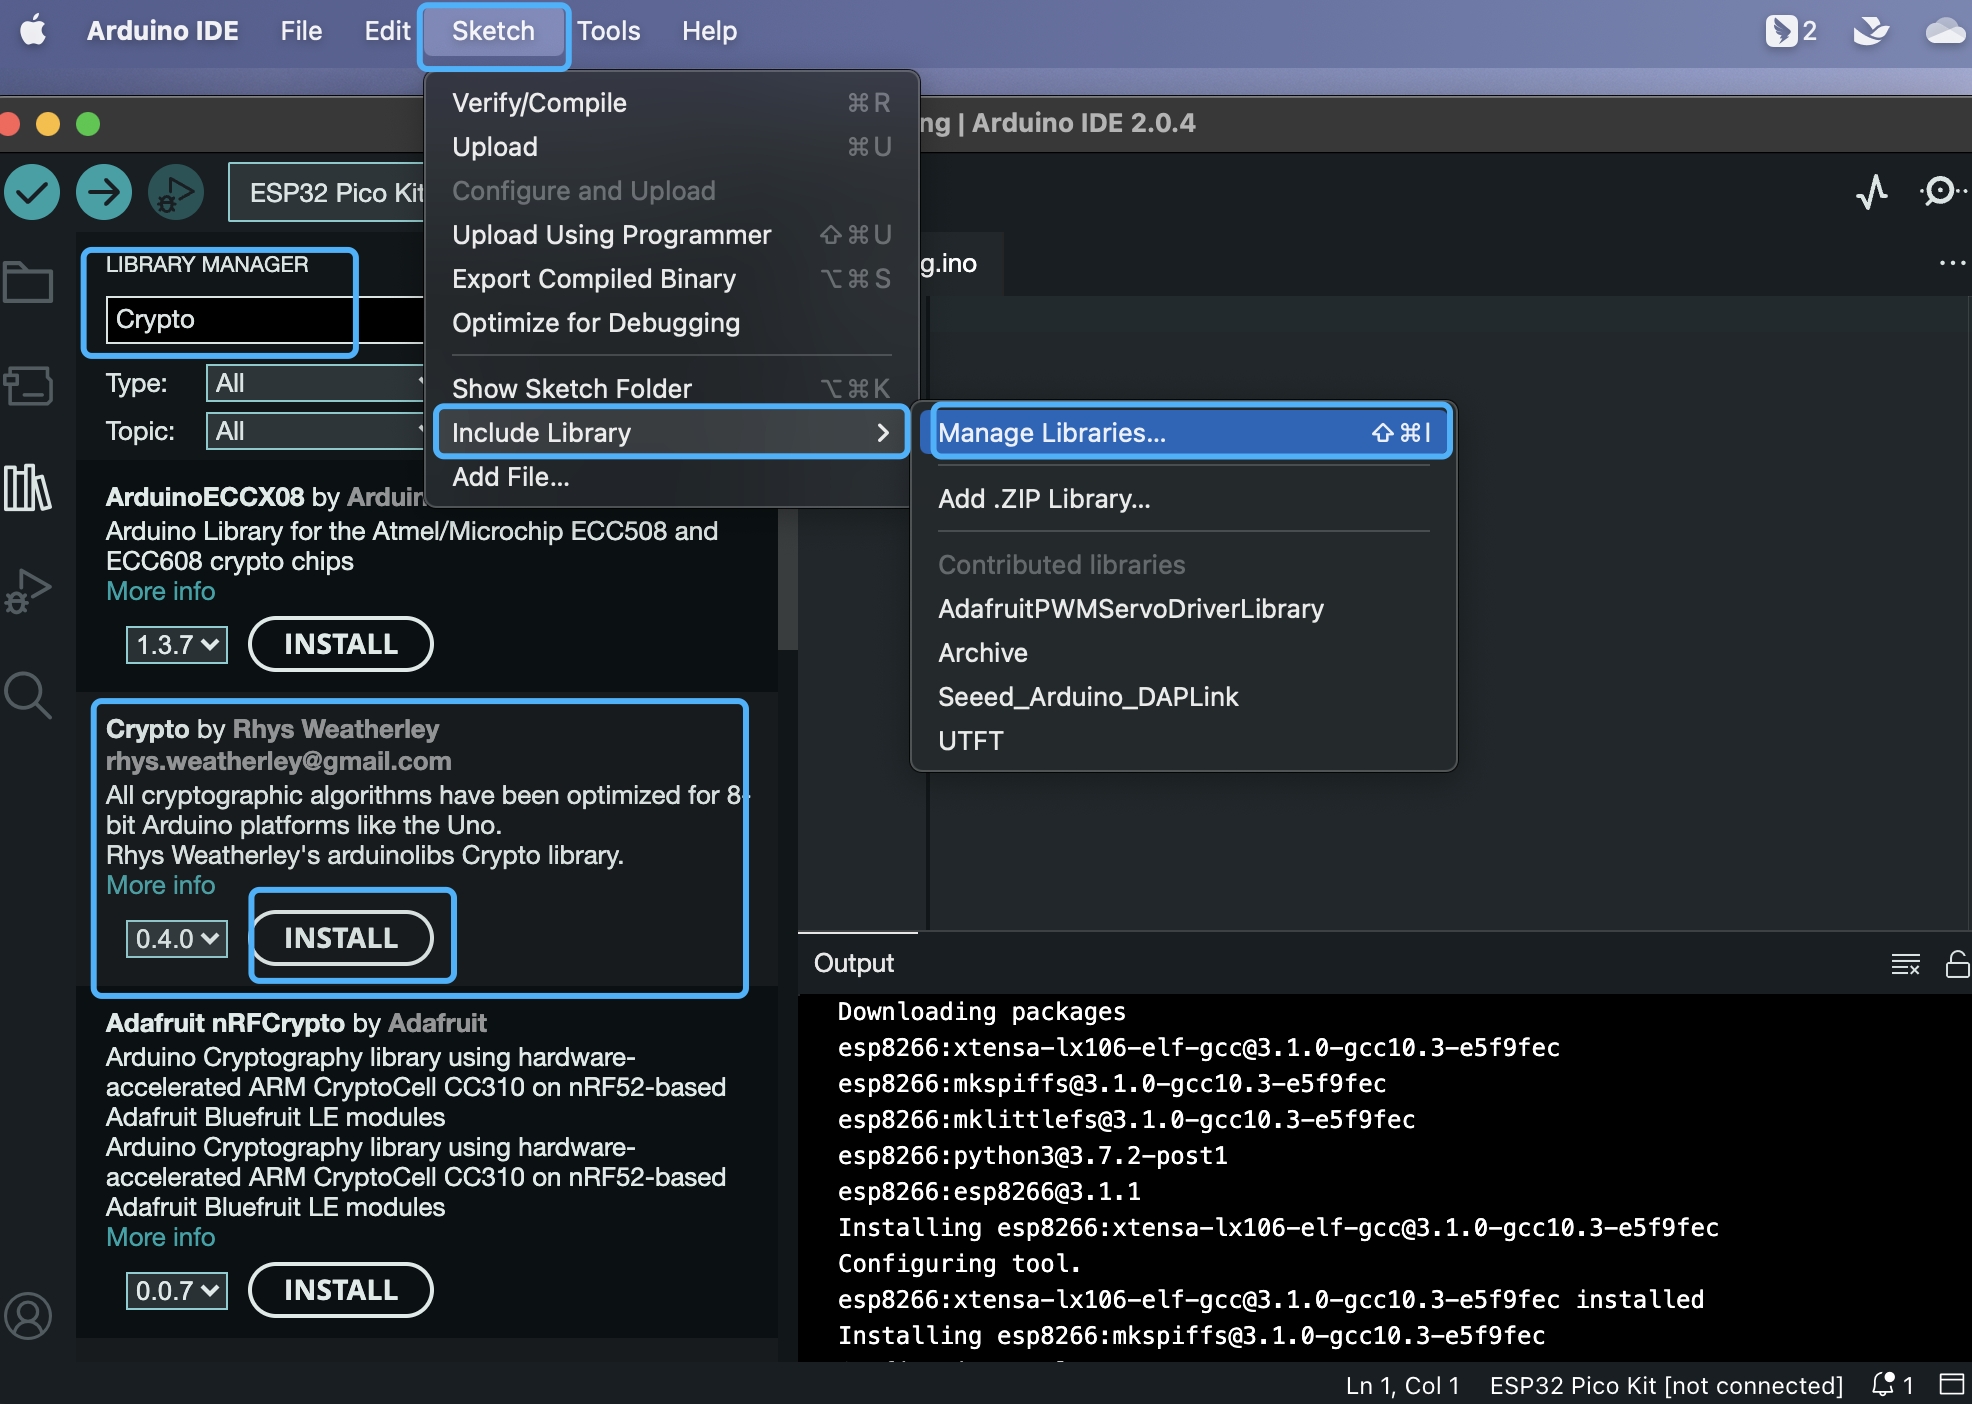
PubSubClient:dowload in google drive and install in Arduino IDE(Sketch-Include Library-Add .ZIP Library)

- ArduinoJson v5:dowload in google drive(same with PubSubClient method)
- Aliyun:download ingoogle drive(same with PubSubClient method)
NodeMCU driver:Open the following NodeMCU link and install the version you need ,we can't find NodeMCU in PC's port if we dont't install it
IOT platform: aliyun,register by yourself
2. IOT platform setting
2.1 Register, log in and go to IOT page


2.2 Creat products in Devices part(this time we choice wifi method in networking connection method)


2.3 Create device


2.4 Define feature of product
Click Device-Product-Define Feature-Edit Draft


You should remind Identifier here and we would use it in Arduino programing

3.Arduino programming
Download arduino coding in this link
get Alibaba Cloud's device information(Product key,Device name,Device secrect)


#define PRODUCT_KEY     "******"//1.exchange  PRODUCT_KEY
#define DEVICE_NAME     "******"//2.exchange  DEVICE_NAME
#define DEVICE_SECRET   "******"//3.exchange DEVICE_SECRET
Fill your WiFi's name and password, if there is no password,just delete "**"and keep it empty
#define WIFI_SSID       "******"//4.exchange WIFI
#define WIFI_PASSWD     "******"//5.exchange WIFI password
Define setting post data and get data
void mqtt_interval_post()
{
    char param[512];
    char jsonBuf[1024];

    //sprintf(param, "{\"MotionAlarmState\":%d}", digitalRead(13)); 7.define it according to your design
    sprintf(param, "{\"LightSwitch\":%d,\"range\":%d}",!digitalRead(LED),val);
    sprintf(jsonBuf, ALINK_BODY_FORMAT, ALINK_METHOD_PROP_POST, param);
    Serial.println(jsonBuf);
    mqttClient.publish(ALINK_TOPIC_PROP_POST, jsonBuf);
}
we need define according to Alibaba Cloud's information LightSwitch,range
sprintf(param, "{\"LightSwitch\":%d,\"range\":%d}",!digitalRead(LED),val);
OK ,we can upload data and test example.
4. Test
Cleck if it is online then click view to check IP


Click Online debug to control the NodeMCU


We rotate Potentiometer and then check the data if change

5. Reference
- NodeMCU
- NodeMCU driver
- Arduino coding
- Reference blog
- reference video
- Github:NodoMCU
- NodeMCU Documentation
- ESP32with Tecentcloud, it need hmac,reference the following case